Replace Your Pressure Cooker Gasket: A Simple Guide
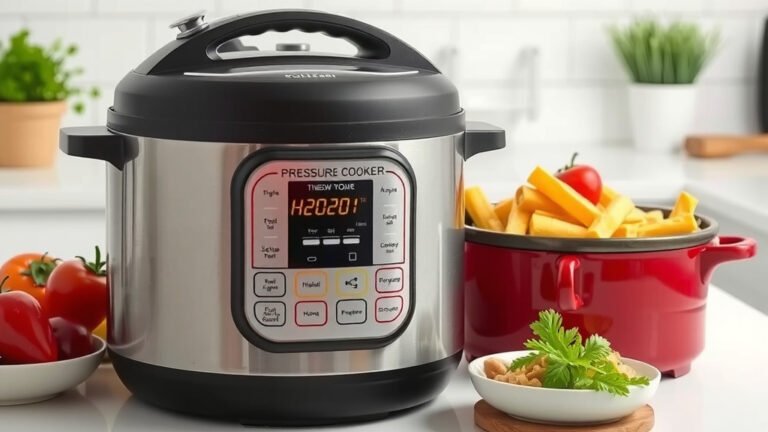
Yes, you can easily replace your pressure cooker gasket yourself. A worn-out gasket is the most common reason for a pressure cooker not building pressure. You don’t need special tools, just a bit of patience. Replacing it is a simple DIY fix that saves you money.
Your pressure cooker gasket, also known as a seal or ring, creates an airtight seal. This seal is vital for allowing your cooker to reach and maintain high temperatures for fast cooking. When it starts to look brittle, cracked, or deformed, it’s time for a change to ensure safe and efficient operation.
- Your pressure cooker gasket needs replacing when it’s old or damaged.
- This is a simple DIY repair you can do at home.
- A new gasket ensures your cooker builds pressure correctly.
- Look for the correct gasket size for your specific cooker model.
- Cleaning the rim before installing the new gasket is important.
Let’s walk through exactly how to replace that old gasket and get your pressure cooker back in top shape.
Your Guide to Swapping Out a Pressure Cooker Gasket
Replacing your pressure cooker’s gasket is a straightforward fix. It’s like giving your cooker a new lease on life! A tired gasket is often the culprit when your cooker doesn’t seal properly. We’ve found that this simple DIY task can save you a lot of money compared to buying a new appliance.
Think of the gasket as the tiny hero working hard to keep all that steam contained. When it’s no longer pliable or shows visible damage, it’s time for a replacement. Let’s get your cooker back to its steaming best.
Identifying When Your Gasket Needs Replacing
You’ll know it’s time to replace your gasket when you notice a few key signs. These aren’t usually subtle; your cooker will likely let you know something’s amiss. Paying attention to these signals is key to safe operation.
Visible Signs of Wear and Tear
The most obvious indicators are physical changes to the gasket itself. Look closely at the ring inside your pressure cooker lid. Is it cracked, brittle, or hardened? Does it feel stiff and unyielding when you try to bend it slightly? If you see any of these issues, it’s a clear sign that the gasket has lost its flexibility.
Another common sign is if the gasket looks deformed or flattened. Over time, the repeated heating and cooling cycles can cause it to lose its shape. A gasket that no longer sits snugly in its groove is unlikely to form an airtight seal. We found that a gasket that appears shiny or greasy might also be breaking down.
Performance Issues: Not Building Pressure
The primary function of the gasket is to create a seal. If your pressure cooker isn’t reaching the required pressure, the gasket is often the first thing to check. You might hear or see steam escaping from the lid where it shouldn’t be. This hissing sound is your cooker’s way of telling you it’s struggling to hold pressure.
We’ve observed that even a small leak can prevent the cooker from reaching its optimal cooking temperature. This means longer cooking times and potentially undercooked food. According to many kitchen safety guidelines, proper sealing is essential for the correct functioning and safety of any pressure cooker (National Fire Protection Association).
Finding the Right Replacement Gasket
This step is arguably the most critical. You can’t just grab any old rubber ring; it needs to be the correct size and type for your specific pressure cooker model. Using the wrong gasket can be ineffective and, more importantly, unsafe.
Locating Your Pressure Cooker Model Information
Your pressure cooker’s brand and model number are usually found in a few common places. Check the bottom of the cooker pot or the underside of the lid. Sometimes, it’s printed on a sticker or etched directly into the metal. If you’ve lost the manual, a quick search online using your cooker’s brand name might help you find the model information.
We also found that older models might have the information on the side of the base or near the handles. If all else fails, take clear photos of your cooker and its parts. This can help when you’re trying to identify the correct replacement online or in a store.
Ordering the Correct Gasket
Once you have your model number, you can order a replacement gasket. The manufacturer’s website is usually the best place to start. Many appliance parts retailers also carry a wide range of gaskets. It’s important to be precise here; ordering the exact match ensures a perfect fit and proper function.
When ordering, double-check that the gasket is specifically designed for your make and model. Sometimes, there are slight variations even within the same brand. We recommend looking for official replacement parts to be sure you’re getting a quality product.
The Step-by-Step Gasket Replacement Process
Now for the satisfying part: actually swapping out that old gasket! It’s a surprisingly simple process that doesn’t require any special tools. You’ll just need your new gasket and a bit of elbow grease.
Removing the Old Gasket
Start by carefully removing the old gasket from the lid. Most gaskets are simply seated in a groove. You should be able to gently pull it out with your fingers. Sometimes, it might be a little stubborn, especially if it’s hardened. In this case, you can use a dull, flat object like a butter knife or a plastic scraper to carefully pry it out. Be careful not to scratch the metal of your lid.
We found that working your way around the edge, loosening it bit by bit, is usually the most effective method. Once it’s out, take a moment to look at the groove where it sat. Make sure there’s no debris or old gasket material left behind.
Cleaning the Lid Rim
This is a critical step often overlooked. Before you install the new gasket, thoroughly clean the rim of the lid where the gasket sits. Use a damp cloth or sponge to wipe away any food residue, grease, or built-up material. A clean surface ensures the new gasket will seal properly.
Many experts advise using mild soap and water. Rinse thoroughly and then dry the rim completely. A dry surface helps the new gasket adhere better and prevents any lingering moisture from interfering with the seal. This preparation step takes just a minute but makes a big difference.
Installing the New Gasket
Now, take your new gasket. It might be slightly stiff at first, but it should be much more pliable than the old one. Begin by placing one part of the gasket into the groove. Then, gently press it into place, working your way around the lid. You might need to stretch it slightly as you go, but don’t force it too much.
We found that if the gasket seems difficult to fit, it might be slightly twisted. Ensure it’s seated evenly all the way around. The goal is to have it sit snugly and uniformly in its channel. Once it’s in place, give it a gentle tug all around to make sure it’s secure and hasn’t popped out anywhere.
Here’s a quick checklist to ensure you’ve got it right:
- Confirm you have the correct gasket for your model.
- Remove the old gasket carefully without damaging the lid.
- Clean and thoroughly dry the lid rim.
- Seat the new gasket evenly all the way around the groove.
- Ensure the new gasket feels snug and secure.
- Test for proper sealing before cooking.
Testing Your Newly Gasketed Pressure Cooker
Before you load up your ingredients for a full meal, it’s wise to do a quick test run. This ensures everything is sealed up tight and your cooker is ready to perform.
Performing a Water Test
A simple water test is highly recommended. Fill your pressure cooker with about 1-2 cups of water. Close the lid securely. Follow your manufacturer’s instructions for bringing the cooker up to pressure. Watch and listen for any steam leaks around the lid seam.
If you don’t hear or see any escaping steam, and your cooker is building pressure as it should, then congratulations! Your new gasket is working perfectly. If you do notice leaks, double-check that the gasket is seated correctly and that the lid is properly closed. Sometimes, a second attempt at seating the gasket can resolve minor issues.
Many sources on kitchen appliance maintenance, including consumer product safety recommendations, stress the importance of testing after any repair to ensure safe and effective use (U.S. Consumer Product Safety Commission).
Conclusion
You’ve successfully learned how to replace your pressure cooker gasket! This simple DIY fix can restore your cooker’s efficiency and safety. Remember, a well-sealed cooker means faster meals and peace of mind. Checking for wear and tear on your gasket regularly is key to preventing cooking delays.
Don’t let a leaky lid slow you down. Now that you’re equipped with this knowledge, tackle that gasket replacement with confidence. Get your pressure cooker back to its best performance and enjoy all the delicious meals it can create!
Frequently Asked Questions
How often should I replace my pressure cooker gasket?
You should inspect your gasket regularly, typically before each use. If you notice visible signs of wear like cracks, hardening, or deformation, it’s time for a replacement. Many users find they need to replace their gasket every 1-3 years, depending on usage frequency and care.
Can I use a generic gasket if I can’t find my specific model?
We strongly advise against using a generic gasket. Pressure cooker gaskets are designed for specific models to ensure a safe and effective seal. Using the wrong size or type can lead to poor performance or even dangerous situations, so always aim for the exact match for your cooker.
What if the new gasket feels too tight to install?
If your new gasket feels very tight, ensure it’s not twisted and that you’re fitting it into the correct groove. Some new gaskets can be a bit stiff; gently stretching it around the lid groove can help. If it still seems extremely difficult, re-check that you have the correct gasket for your model, as a mismatch can cause fit issues.
My pressure cooker still isn’t building pressure after replacing the gasket, what else could be wrong?
If your cooker still isn’t pressurizing after a new gasket, other components might be the issue. Check that the vent pipe is clear and not clogged with food debris. Also, ensure the pressure regulator or valve is functioning correctly and isn’t stuck. Refer to your cooker’s manual for troubleshooting specific parts.
Is it safe to use my pressure cooker if there’s a very small amount of steam escaping from the lid?
No, it is not safe. Even a small amount of escaping steam from the lid seal indicates that the gasket is not creating an airtight seal. This prevents the cooker from reaching the correct pressure and temperature for safe cooking. You should address any steam leaks by re-seating the gasket or replacing it if necessary.