Measure Water for Perfect Rice Cooker Rice
Measuring water for your rice cooker is surprisingly simple! The easiest way to get perfectly cooked rice is to use the rice cooker’s measuring cup and follow the lines inside the inner pot. Most rice cookers come with a special cup, which is usually smaller than a standard US cup, so using that one is key.
Getting the water ratio right is the secret to fluffy, delicious rice. Too much water, and your rice can be mushy. Too little, and it might be hard or even burnt. Following the manufacturer’s instructions and the markings in your cooker ensures you avoid common rice-cooking pitfalls.
- Use the rice cooker’s special measuring cup.
- Rinse your rice before cooking.
- Fill water to the corresponding line for your rice type.
- Don’t overfill the pot past the max line.
Let’s walk through exactly how to get that water measurement just right, step by step.
Getting Your Water Measurement Right for Perfect Rice
You’ve got your rice cooker, you’ve got your rice, but how much water do you actually need? It’s a question that trips up many home cooks. The good news is, it’s usually much simpler than you think! Most modern rice cookers are designed to make this process incredibly straightforward.
Let’s break down how to nail that perfect rice-to-water ratio every single time. We’ll cover the tools you’ll need and the steps to follow.
The Rice Cooker’s Built-In Measurement System
Your rice cooker is your best friend for this task. It comes with a system designed to take the guesswork out of cooking rice. Understanding how this system works is key to your success.
Understanding Your Rice Cooker’s Inner Pot Markings
Take a look inside your rice cooker’s inner pot. You’ll see a series of **horizontal lines** etched or printed on the side. These lines are your guideposts. They correspond to different amounts of rice and water.
These markings are calibrated specifically for your cooker. They account for how much space the rice grains will expand into. You’ll typically find markings for different types of rice, like white rice, brown rice, or even sushi rice. This makes it super convenient.
The Special Rice Cooker Measuring Cup
Did your rice cooker come with a small plastic cup? That’s not just any measuring cup. It’s usually a very specific size, often smaller than a standard US cup. Many sources, including appliance manuals, recommend using this specific cup for accuracy (Cuisinart Manual).
Why is this cup so important? Because the markings inside your pot are based on the volume this particular cup measures. If you use a regular kitchen cup, your water-to-rice ratio will likely be off. This is a common mistake people make!
The Step-by-Step Process for Measuring Water
Now that you know about the markings and the cup, let’s walk through the actual measurement process. It’s a simple sequence of actions.
Step 1: Measure Your Rice
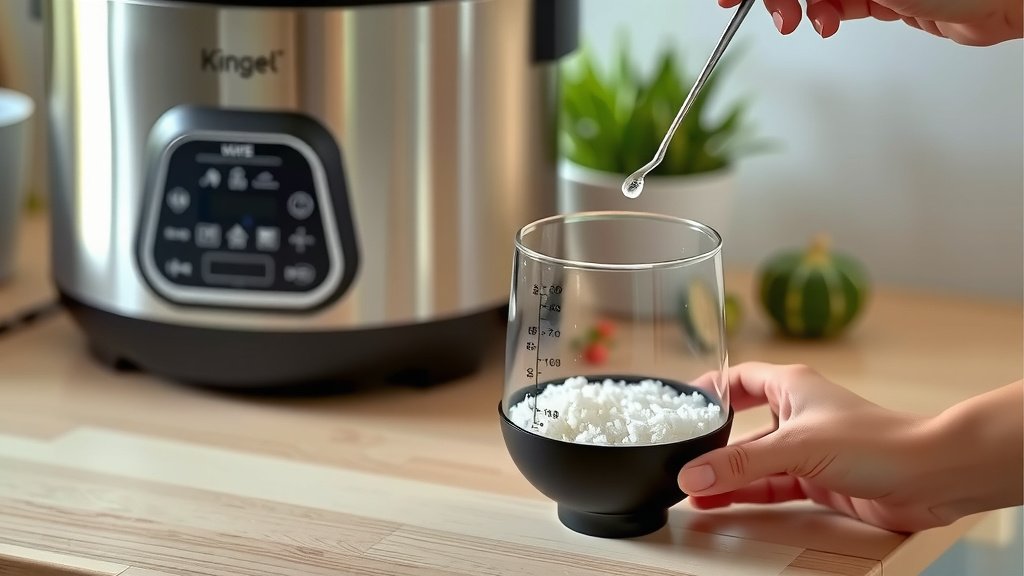
Use the special rice cooker cup to measure the amount of uncooked rice you need. Place the rice in the inner pot. For example, if you want to cook 2 cups of rice, use the rice cooker cup to scoop it out.
Step 2: Rinse Your Rice (Optional but Recommended)
While not strictly a water measurement step, rinsing your rice makes a big difference in texture. Swish the rice around in the pot with your hand under cool running water. Drain the cloudy water until it runs clearer. This removes excess starch, preventing mushy rice and helping grains stay separate.
Step 3: Add Water to the Correct Line
This is where the magic happens. Look for the line inside the pot that matches the number of cups of rice you measured. For 2 cups of rice, find the line marked ‘2’. Pour clean, cool water into the pot until it reaches that specific line.
So, if you measured 2 cups of rice using the rice cooker cup, you’ll fill the water up to the ‘2’ line inside the pot. It’s that straightforward! Don’t overthink it. The cooker designers did the thinking for you.
What If My Rice Cooker Doesn’t Have Lines for My Rice Amount?
This can happen, especially with older or more basic models. In this case, you’ll need to rely on the general ratio recommended by the rice manufacturer or your cooker’s manual. A common starting point for white rice is a 1:1.5 or 1:2 ratio of rice to water by volume (USDA Guidelines on Grains).
For example, if you’re cooking 1 cup of rice (using the special cup) and the lines are missing, you might add 1.5 cups of water. Always check your rice packaging for specific instructions. It’s like getting a personalized recipe for your exact grain.
Step 4: Check the Maximum Fill Line
Rice expands as it cooks. Your rice cooker has a maximum fill line. This is usually clearly marked. Never fill the pot beyond this line, even if you’re cooking a large batch. Overfilling can lead to overflow, messy cooking, and potentially damage to your appliance.
Think of it like a busy restaurant kitchen. If too many cooks are in the kitchen, things get chaotic. The same applies to your rice cooker pot – give your rice and water enough room to do their thing!
Troubleshooting Common Water Measurement Issues
Even with the best instructions, sometimes things go a bit awry. Don’t worry, it happens to everyone!
My Rice Came Out Too Mushy
This usually means you used too much water. Double-check that you used the rice cooker’s special cup and filled to the correct line. If you’re still getting mushy rice, try reducing the water by a tablespoon or two the next time. Sometimes, slight adjustments are needed based on the specific rice you’re using.
My Rice Came Out Hard or Burnt
This points to not enough water. Again, verify your measuring cup and the line you used. You might need to add a little more water. If the bottom is consistently burnt, you might be using too much rice for the amount of water, or the heat setting might be too high (if applicable).
Using Different Types of Rice
Different rice varieties absorb water differently. White rice cooks faster and needs less water than brown rice. Sushi rice often requires a specific amount to get that sticky texture. Most rice cooker pots will have markings for these different types.
Always refer to the markings on your inner pot for guidance. If you’re unsure, check the rice packaging or your rice cooker’s manual. For instance, brown rice might need to go up to the ‘3’ line if you’re cooking 2 cups of white rice. This is because brown rice grains are denser and need more hydration.
Water Measurement Cheat Sheet
Here’s a quick reference to help you remember the key points:
- Always use the included rice cooker measuring cup.
- Find the corresponding line inside the pot for your rice amount.
- Rinse your rice for better texture.
- Never go above the maximum fill line.
- Adjust slightly if your rice is consistently too hard or too soft.
Conclusion
You’ve mastered the art of measuring water for your rice cooker! By using the included measuring cup and following the specific lines inside your pot, you’re set for perfect rice every time. Remember, rinsing your rice is a great habit for better texture, and always respect that maximum fill line. Don’t be afraid to make tiny adjustments if needed based on your specific rice and cooker. Now you can enjoy consistently fluffy, delicious rice with confidence. Your next perfectly cooked bowl is just a measurement away!
Frequently Asked Questions
What if my rice cooker didn’t come with a measuring cup?
If your rice cooker is missing its special cup, you’ll need to find a standard liquid measuring cup. Measure your rice first, then use a ratio recommended by your rice cooker’s manual or the rice packaging. A common starting point for white rice is 1:1.5 or 1:2 rice to water ratio.
Can I use a regular coffee mug to measure rice and water?
It’s best not to rely on a coffee mug or a standard kitchen measuring cup if your rice cooker came with its own. The cooker’s markings and cup are calibrated to work together. Using different tools can easily lead to the wrong water ratio and affect your rice texture.
Why does brown rice need more water than white rice?
Brown rice has a tougher outer bran layer. This layer requires more time and more water to soften and cook properly. Most rice cookers have separate lines for brown rice to accommodate this difference.
How do I know which line to use if I’m cooking a mix of rice types?
When cooking a mix, such as white and brown rice, it’s generally best to follow the water line that corresponds to the rice type that requires more water. In this case, use the brown rice line. This ensures the denser grains get enough hydration to cook through.
What if I want to cook more rice than the maximum line allows?
You should never fill your rice cooker beyond the maximum fill line indicated inside the pot. Rice expands significantly during cooking, and exceeding this limit can cause overflow, make a mess, and potentially damage your appliance. For larger quantities, you might need to cook in batches.